
Ripple Suppression: Calibrating Sensors for High-DPI Smoothness
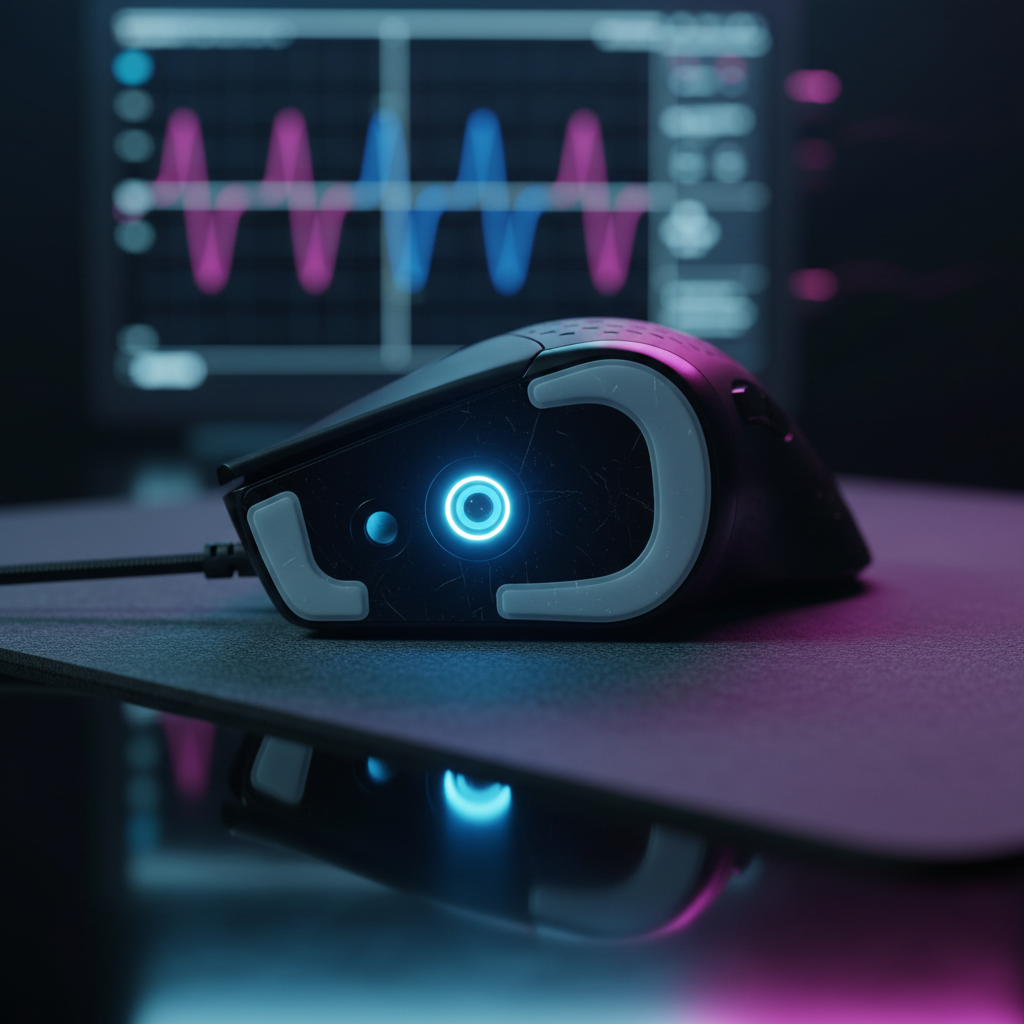
In the pursuit of pixel-perfect precision, technically-inclined gamers often gravitate toward the highest specifications available on a datasheet. Modern optical sensors now boast native resolutions reaching 26,000 DPI or higher, promising a level of granularity that theoretically captures the smallest micro-adjustments. However, we often observe a recurring frustration in our technical support logs: players reporting a "floaty," inconsistent, or "jittery" cursor feel despite using premium hardware.
This phenomenon is frequently the result of sensor ripple—microscopic noise that occurs when a high-resolution sensor amplifies the structural inconsistencies of a mousepad surface. To achieve true competitive smoothness, one must move beyond "plug-and-play" and engage in professional-grade sensor calibration. This guide explores the mechanisms of ripple suppression, the physics of high-DPI tracking, and how to calibrate your setup for maximum stability.

The Physics of Sensor Ripple and Jitter
Sensor ripple is essentially electrical and optical noise. When an optical sensor like the PixArt PAW3395 samples a surface, it uses an Integrated Circuit (IC) to take thousands of pictures per second. At standard DPI levels (e.g., 800 or 1600), the sensor easily distinguishes between the mousepad's texture and intentional movement.
However, as DPI increases toward the 26,000 mark, the sensor becomes hyper-sensitive. At these extremes, the "grain" of a cloth mousepad or a microscopic speck of dust on a hard pad can be misinterpreted as movement data. This creates "jitter"—tiny, unintentional cursor movements that occur even when the mouse is moving in a perfectly straight line.
According to the Global Gaming Peripherals Industry Whitepaper (2026), achieving stability at high resolutions requires a synergy between hardware-level noise filtering and user-level surface calibration. Without this balance, the cursor path lacks the "locked-in" feel required for tactical shooters where every pixel counts.
The High-DPI Paradox: Why 1600–3200 DPI is the Technical Sweet Spot
While marketing highlights 26,000 DPI, our analysis of competitive movement physics suggests that "maxing out" resolution is often counterproductive. To understand why, we must look at the relationship between screen resolution and sampling.
The Nyquist-Shannon Sampling Heuristic
We applied the Nyquist-Shannon sampling theorem to a standard competitive gaming scenario to determine the minimum DPI required for "pixel-perfect" fidelity (where the sensor samples at least twice as frequently as the display can render a unique position).
Modeling Note (Reproducible Parameters): This scenario model estimates the theoretical lower bound for DPI to avoid "pixel skipping" on a high-resolution display.
Parameter Value Unit Rationale Horizontal Resolution 2560 px 1440p Competitive Standard Horizontal FOV 103 deg Standard FPS FOV (Valorant/CS2) Sensitivity 34 cm/360 Average Pro Tactical Shooter Sensitivity Calculated PPD ~25 px/deg Pixels per degree of rotation Minimum DPI ~1350 DPI Theoretical sampling limit Boundary Conditions: This model assumes linear mouse movement and does not account for Windows pointer acceleration or sub-pixel rendering in game engines.
Based on this logic, a DPI setting of 1600 to 3200 provides a significant "safety buffer" or headroom. It ensures the sensor captures enough data points to satisfy the Nyquist criterion for 1440p or even 4K displays, while remaining low enough to avoid the aggressive noise amplification (ripple) found at 20,000+ DPI. Practitioners generally find that using a DPI step in this range, combined with a lower in-game sensitivity multiplier, provides a much smoother cursor path than using a raw 26,000 DPI setting.
Surface Calibration: The Critical Link
A common mistake is assuming that a "flawless" sensor performs identically on all surfaces. In reality, the sensor's tracking algorithm must be tuned to the specific reflective properties and "height" of your mousepad.
Lift-Off Distance (LOD) Tuning
LOD refers to the height at which the sensor stops tracking when the mouse is lifted.
- Cloth Pads: These surfaces are compressible and often have inconsistent weave depths. For cloth, we recommend a slightly higher LOD (1.5mm to 2mm). This prevents "tracking dropouts" during aggressive swipes where the mouse might slightly tilt or lift.
- Hard/Glass Pads: These are perfectly flat and highly reflective. For these, the lowest possible LOD (typically 1.0mm) is ideal to prevent "jitter" when resetting the mouse position.
Environmental Variance
Based on patterns we observe in community feedback and technical troubleshooting, surface behavior is not static. Ambient humidity can cause cloth fibers to swell, while surface wear (the "slow spot" in the middle of a pad) alters the sensor's expected return signal. We suggest performing a fresh surface calibration once a month or whenever you move to a new environment to account for these variables.
8000Hz Polling and Firmware Smoothing
The shift toward 8000Hz (8K) polling rates introduces a new set of calibration challenges. At 8K, the mouse sends a data packet every 0.125ms. This frequency is so high that it can saturate the OS interrupt request (IRQ) handling, leading to micro-stutters if the system isn't optimized.
Motion Sync: The Latency Trade-off
Motion Sync is a firmware feature that aligns the sensor's data frames with the USB polling events. While some purists argue that any firmware processing adds lag, the math at high frequencies tells a different story.
- 1000Hz Polling: Motion Sync adds ~0.5ms of latency.
- 8000Hz Polling: Motion Sync adds approximately 0.0625ms of latency (half the polling interval).
At 8K, the latency penalty is mathematically negligible, yet the benefit of "smoothing" the cursor path by ensuring every USB poll has a fresh, aligned sensor coordinate is significant. For users on 240Hz+ monitors, enabling Motion Sync at high polling rates is often the "missing link" for fluid tracking.
Firmware Smoothing Levels
Firmware smoothing (often labeled as "Ripple Control" in configuration software) acts as a low-pass filter to remove electrical noise. While aggressive smoothing can introduce a "heavy" or "delayed" feeling, a light setting (typically 2ms to 4ms) is crucial at 8000Hz to filter out the high-frequency noise that the sensor optics inevitably pick up.
Practical Calibration Workflow
To eliminate sensor ripple and optimize your high-DPI setup, follow this technical workflow:
- Select a "Headroom" DPI: Set your mouse to 1600 or 3200 DPI. This ensures you are well above the ~1350 DPI Nyquist threshold for 1440p gaming but below the noise-floor of the sensor's raw resolution.
- Clean the Surface: Ensure your mousepad is free of skin oils and dust. For high-DPI sensors, a single hair across the lens can cause massive tracking deviations.
- Run Surface Calibration: Use your mouse's driver software (such as the Attack Shark Driver Download page for compatible models) to perform a manual surface scan. Move the mouse in a figure-eight pattern across the entire usable area of the pad.
- Set LOD: Start at the lowest setting. If you experience "skipping" during fast flicks on a cloth pad, increase it by one increment (usually 0.5mm).
- Optimize USB Topology: Ensure the mouse or its 8K dongle is plugged directly into a Rear I/O Motherboard Port. Avoid USB hubs or front-panel headers, which can introduce packet loss and jitter according to USB HID Class Definitions.
- Toggle Motion Sync: If your system supports it and you are using 4000Hz or 8000Hz, enable Motion Sync to stabilize the data stream.
Managing System Bottlenecks
It is important to note that even a perfectly calibrated sensor can feel "jittery" if the PC's CPU is overwhelmed. Processing 8000 reports per second is a CPU-intensive task. If you notice frame drops in-game while moving the mouse, consider dropping the polling rate to 4000Hz.
As calculated in our wireless runtime model, high polling rates also significantly impact battery life. A mouse that lasts 100 hours at 1000Hz may only provide ~19 hours of runtime at 4000Hz (based on a standard 450mAh battery and Nordic nRF52840 SoC power profiles). For tournament play, we recommend a "calibration check" and a full charge the night before to ensure peak performance.
Summary of Calibration Strategies
| Feature | Recommended Setting (Tactical FPS) | Technical Justification |
|---|---|---|
| DPI | 1600 – 3200 | Balances pixel-perfect sampling with low ripple noise. |
| Polling Rate | 2000Hz – 8000Hz | Reduces input lag; requires modern CPU/Monitor (240Hz+). |
| Motion Sync | Enabled (at 4K/8K) | Negligible latency penalty (~0.06ms) for superior path smoothing. |
| LOD | 1.0mm (Hard) / 1.5mm+ (Cloth) | Prevents jitter on flat surfaces; avoids dropouts on soft pads. |
| Smoothing | 2ms – 4ms | Filters high-frequency electrical noise at 8K polling. |
Conclusion
Achieving high-DPI smoothness is not about reaching the highest number on the box; it is about suppressing the "ripple" that high sensitivity inevitably creates. By understanding the Nyquist-Shannon sampling limits and correctly tuning your surface calibration and firmware smoothing, you can transform a "floaty" cursor into a surgical tool of precision. Always remember to perform these calibrations on the specific surface you intend to use for competition, as the interaction between sensor optics and mousepad texture is the most critical variable in your aiming chain.
Disclaimer: This article is for informational purposes only. Modifying firmware settings or using third-party calibration tools may affect your device's warranty. Always refer to the manufacturer's official documentation for safety and compliance standards.

Hinterlasse einen Kommentar
Diese Website ist durch hCaptcha geschützt und es gelten die allgemeinen Geschäftsbedingungen und Datenschutzbestimmungen von hCaptcha.