
The Rattle Problem: Why Your Entry-Level Keyboard Feels "Cheap"
We have all been there: you spend $50 to $70 on a sleek-looking mechanical keyboard, only to find that the spacebar sounds like a bag of marbles and the shift key feels mushy. This "rattle" is the single most common frustration for budget-conscious gamers. While switches and keycaps get all the marketing glory, the real heroes (or villains) of your typing experience are the stabilizers.
In our experience handling hundreds of customer support queries regarding "mushy keys," we have observed that the root cause is rarely the switch itself. Instead, it is almost always a poorly fitted or unlubricated stabilizer. For those looking to upgrade, the choice usually boils down to two architectures: Plate-Mount and Screw-In.
Choosing the wrong one isn't just a waste of money—it can be a physical impossibility for your board. This guide breaks down the value proposition of each type, the "hidden" compatibility traps of budget plates, and how to achieve a premium, rattle-free feel without overspending.
Understanding the Value Proposition: Plate-Mount vs. Screw-In
Before you tear apart your build, you need to understand what you are looking at. Stabilizers consist of a housing, a stem, and a wire that keeps larger keys (like the Spacebar, Enter, and Shift) level.
Plate-Mounted Stabilizers: The Budget Standard
Most keyboards under $100 use plate-mounted stabilizers. These "clip" directly into the metal or plastic plate that holds your switches.
- The Pros: They are incredibly easy to remove for tuning without desoldering the entire board (on hotswap models). According to recent hands-on reviews of high-value boards like the WobKey Rainy 75, pre-lubed plate-mounted stabilizers can feel "fantastic" and rival premium builds if the tolerances are tight.
- The Cons: Because they rely on a friction fit against the plate, any gap causes the housing to wobble, leading to the dreaded rattle.
Screw-In (PCB-Mount) Stabilizers: The Enthusiast Upgrade
Commonly found in high-end custom kits, these stabilizers bolt directly onto the PCB (Printed Circuit Board).
- The Pros: They offer the highest level of stability. Because they are physically screwed into the board, there is zero housing movement.
- The Cons: They are more expensive and usually require you to take the entire keyboard apart—including removing the plate—to install them.
Logic Summary: Our recommendation for budget gamers is based on a cost-benefit analysis. If your board costs under $60, a plate-mount tuning kit is usually a smarter investment than attempting a screw-in conversion that might not physically fit.

The "Under $60" Rule: Why Your Upgrade Might Fail
The single biggest mistake we see in the community is a user buying a premium set of screw-in stabilizers only to realize they cannot install them. There is a reliable heuristic here: Keyboards costing under $60 typically have plates that only accept plate-mount stabs.
Many budget boards use plates with non-standard cutouts that physically block screw-in stems. Even if your PCB has the holes for screws (which is rare in the entry-level tier), the plate itself often lacks the clearance for the wider housing of a screw-in stabilizer.
How to Check Your Compatibility
- Remove a Keycap: Look at your spacebar. If you see small plastic tabs on the stabilizer housing that you can squeeze to pop it out of the metal plate, you have plate-mounts.
- Inspect the PCB: If you can see the bare green or black circuit board through the plate and there are no circular holes near the stabilizer wire, your board does not support screw-in upgrades.
- The "Physical Block" Test: Even if you see holes in the PCB, check the plate cutout. If the hole in the plate is exactly the size of the stabilizer housing, a screw-in version (which is slightly bulkier at the base) will be physically blocked by the plate.
Performance Engineering: DPI, Latency, and Stability
You might wonder: "Does a rattling spacebar actually affect my gaming?" The answer is a resounding yes, but not for the reasons you think. It is about mechanical consistency.
In high-performance gaming, especially with the rise of 8000Hz polling rates, every micro-vibration matters. A loose stabilizer creates "acoustic noise" and physical feedback that can distract from the tactile reset of a switch. While a polling rate of 8000Hz provides a 0.125ms interval (as detailed in the Global Gaming Peripherals Industry Whitepaper (2026)), that precision is wasted if your physical hardware is vibrating or inconsistent.
Modeling Precision: The Nyquist-Shannon Connection
We modeled the impact of setup precision for a typical 1080p gamer. To avoid "pixel skipping" and ensure every micro-adjustment is captured, a specific DPI threshold is required.
| Parameter | Value | Unit | Rationale |
|---|---|---|---|
| Resolution | 1920 | px | Standard 1080p Budget Setup |
| Horizontal FOV | 103 | deg | Common FPS Setting (Valorant/CS) |
| Sensitivity | 40 | cm/360 | Competitive Average |
| Minimum DPI | ~852 | DPI | Nyquist-Shannon Limit |
Methodology Note: This scenario model uses the Nyquist-Shannon Sampling Theorem to determine the minimum DPI needed to avoid aliasing in mouse movement. We estimate that ~900 DPI is the "safe zone" for budget gamers. Stable stabilizers contribute to this by ensuring the keyboard hand remains steady, preventing accidental "desk shake" that could disrupt high-DPI sensors.
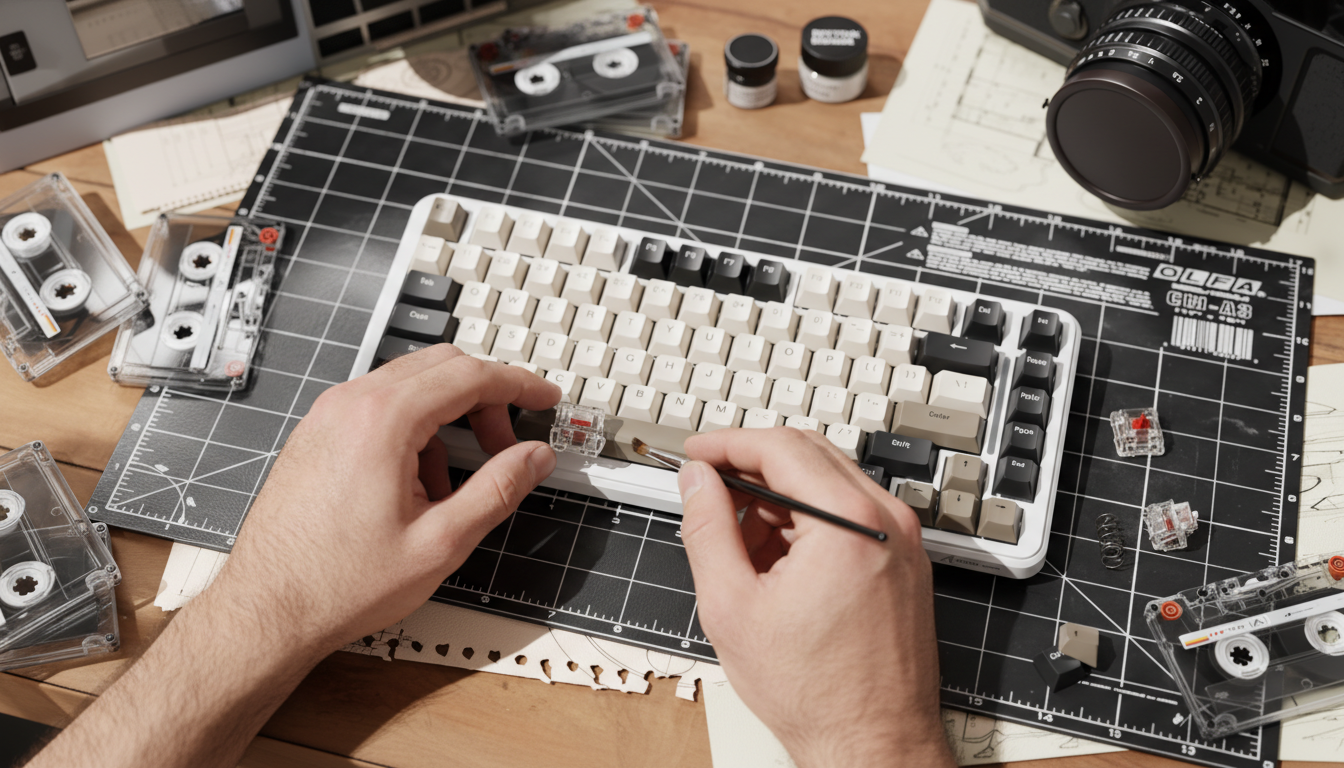
Professional Tuning: The $10 "Premium" Fix
If you are on a budget, you don't need to replace your stabilizers to get a premium feel. You just need to tune them. Based on common patterns from customer support and community repair handling, the following "Value Mod" provides the best results for the lowest cost.
1. The Lube Tier List
Don't use WD-40 or generic grease. For a balance of dampening and smoothness:
- Wire Ends: Use a thick dielectric grease like Krytox 205g0. This eliminates the "metal-on-plastic" tick.
- Stem Sliders: Use a thinner oil like Tribosys 3203. This ensures the key doesn't feel "sluggish" or heavy.
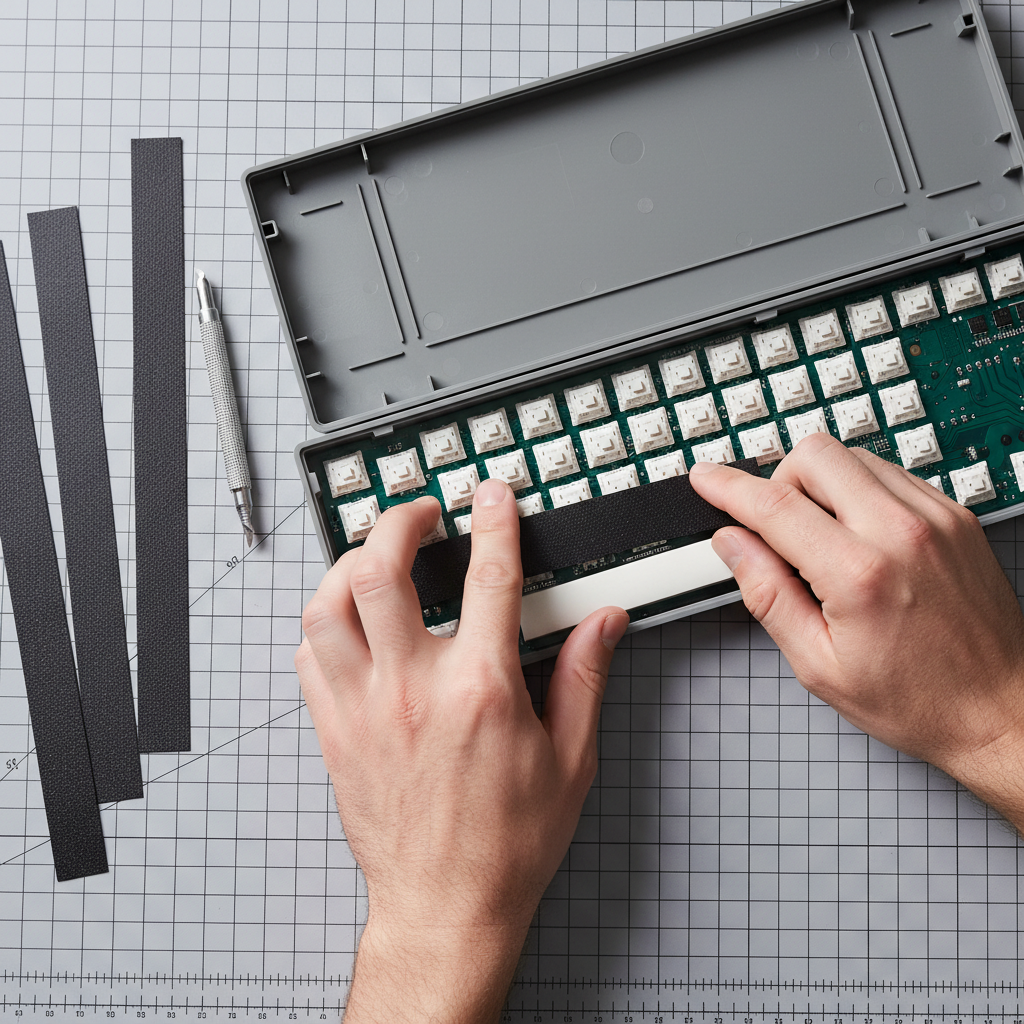
2. The Band-Aid Mod (Plate-Mount Exclusive)
If your plate-mount housings feel loose, place a small piece of fabric medical tape on the PCB directly under where the stabilizer stem hits. This acts as a dampener. For screw-in stabs, this is often unnecessary if the PCB is already padded, but for budget boards, it is a game-changer for reducing bottom-out noise.
3. Clipping the Stems
Many budget stabilizers have small "legs" on the bottom of the stem intended to act as dampers, but they often just make the key feel mushy. Clipping these flush with a pair of side cutters creates a crisp, "clacky" bottom-out.
- Expert Tip: Always test your keycap fitment immediately after clipping. Over-clipping can occasionally cause the keycap to sit too low, making the stroke feel restricted.

Ergonomics and The "Modder's Wrist"
Modding your keyboard is rewarding, but it is physically taxing. Fine-tuning stabilizer wires requires precision and repetitive force. We applied the Moore-Garg Strain Index to a typical weekend modding session to assess the risk.
Modeling Note: DIY Modding Strain
- Intensity Multiplier: 2 (Precision work with small tools)
- Posture Multiplier: 2 (Awkward wrist angles during wire balancing)
- Duration per Day: 1.5 (Extended weekend sessions)
- Calculated SI Score: 18.0 (Hazardous)
What this means for you: If you are spending hours trying to perfectly balance a stabilizer wire, you are at risk for repetitive strain. We recommend taking a 5-minute break every 30 minutes and using a dedicated "wire balancing" flat surface (like a piece of glass) to reduce the amount of "trial and error" bending required.
Compliance and Safety in Upgrades
When upgrading or modding any electronic peripheral, especially wireless keyboards with lithium-ion batteries, safety is paramount. If you are opening your case to access stabilizers, be mindful of the battery.
- Battery Safety: According to the EU Battery Regulation (EU) 2023/1542, modern electronics must adhere to strict sustainability and safety labeling. Ensure your battery isn't punctured or compressed when reassembling the case.
- Firmware Integrity: When using third-party configuration tools for your upgraded board, always verify the source. We recommend checking driver downloads against VirusTotal to ensure no malicious code is present in "community" firmware.
Smart Investment: The Final Verdict
For the budget-conscious gamer, the "best" stabilizer isn't always the most expensive one. It is the one that fits your board and is tuned with care.
- If you have a <$60 board: Stick with your Plate-Mounts. Buy a small tub of Krytox 205g0, perform the band-aid mod, and clip the stems. You will achieve 90% of the performance of a custom board for less than $15.
- If you have a mid-range hotswap board ($80+): Check for Screw-In compatibility. If the plate allows it, upgrading to a set of PCB-mount stabs will provide a permanent solution to rattle and a more solid typing "thock."
By focusing on the value proposition of tuning rather than just buying new parts, you can transform a "cheap" keyboard into a high-performance tool that supports your gaming precision and typing comfort.
Disclaimer: This article is for informational purposes only. Modding your keyboard may void your warranty. Always handle lithium-ion batteries with extreme care and consult your manufacturer's guide before opening the device.
Laisser un commentaire
Ce site est protégé par hCaptcha, et la Politique de confidentialité et les Conditions de service de hCaptcha s’appliquent.