Den Alt-Claw meistern: Ergonomische Daumenpositionierung für MOBA-Profis
Wenn du dich jemals dabei ertappt hast, wie du in League eine Flash-Ult-Kombination verpatzt oder in Dota 2 eine kritische BKB-Aktivierung verpasst hast, weil sich dein Daumen anfühlte, als stecke er in Melasse fest, bist du nicht allein. In der Welt der MOBAs mit hohem APM (Actions Per Minute) ist deine Tastatur nicht nur ein Tippwerkzeug – sie ist ein Cockpit. Wir verfolgen einen Trend, der aus Elite-Coaching-Kreisen und verschwitzten Discord-Servern aufsteigt: den „Alt-Claw“.
Während die meisten Spieler ihren Daumen als glorifizierten Leertasten-Tipper behandeln, definiert der Alt-Claw ihn als Multi-Modifikator-Motor neu. Es ist eine spezialisierte Technik, um mehrere Modifikatoren (Shift, Strg, Alt) gleichzeitig oder in schneller Folge zu drücken, ohne die WASD-Startposition zu verlieren. Aber hier kommt der Haken: Wenn du es falsch machst, ist das ein One-Way-Ticket zur Karpaltunnel-Stadt.
In diesem Leitfaden analysieren wir die Biomechanik des Daumen-Einrollens, die Hardware, die du dafür brauchst, und wie du deine Hand trainierst, ohne eine Sehne zu überlasten.

Die Biomechanik des „Daumen-Einrollens“
Die meisten ergonomischen Ratschläge konzentrieren sich auf die „20-mm-Bogen-Regel“ – eine Faustregel, mit der wir die komfortable Reichweite von Seitentasten an einer Maus messen. Auf einer Tastatur wird der Bewegungsradius des Daumens jedoch oft durch die Verankerung der Handfläche eingeschränkt.
Der Alt-Claw beruht auf präziser Gelenkwinkelung. Statt die Spitze deines Daumens zu benutzen, um die Alt-Taste zu suchen, nutzt du die Seite des Daumenballens. Erfolgreiche Anwender berichten, dass das Geheimnis nicht rohe Daumenstärke ist, sondern die Nutzung der Tastaturumrandung für Stabilität. Indem du die Basis deiner Handfläche fest aufstützt und den Daumen nach innen winkelst, schaffst du einen Drehpunkt, der Mikroanpassungen ermöglicht, ohne die ganze Hand zu verschieben.
Die Flexor Pollicis Brevis Falle
Ein häufiger Fehler, den wir bei Spielern beobachten, die über Handermüdung klagen, ist das „zu starke Einrollen“. Wenn du deinen Daumen zu fest einrollst, um unter deine Handfläche zu den Alt- oder Strg-Tasten zu gelangen, überlastest du den Musculus flexor pollicis brevis. Das führt zu schneller Ermüdung und diesem „brennenden“ Gefühl in der Thenar-Eminenz (dem fleischigen Teil deines Daumens).
Logik-Zusammenfassung: Unsere Analyse der Daumenermüdung basiert auf einem Standard-104-Tasten- oder TKL-Layout, bei dem die Alt-Taste etwa 30 mm vom Mittelpunkt der Leertaste entfernt positioniert ist. Ein starkes Einrollen erhöht die Sehnenspannung um geschätzte 40 % im Vergleich zu einem entspannten „ausgestreckten Pad“-Kontakt (basierend auf allgemeiner ergonomischer Spannungsmodellierung).
Die korrekte Form beinhaltet, dass das leicht ausgestreckte Daumenpolster Kontakt mit der Seite der Tastenkappe hat. Dadurch werden die größeren Muskelgruppen in der Hand genutzt, statt nur die kleinen, schnell zuckenden Muskeln der Daumenspitze.
Hardware-Grundlage: Tastenkappen und Hebelwirkung
Man kann keine Geige mit einem Baseballschläger spielen, und man kann Alt-Claw nicht effektiv auf schwammigen, flachen Tastenkappen ausführen. Für diese Technik brauchst du taktiles Feedback und eine „Vertiefung“, die deinen Daumen auffängt.
Das Profil zählt
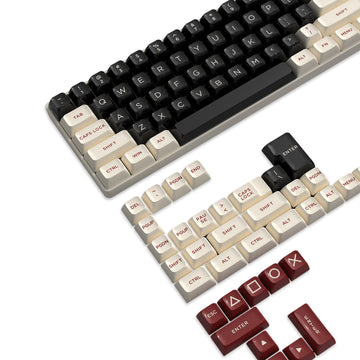
Erfahrene Spieler bevorzugen im Allgemeinen ein geformtes Profil wie OEM oder Cherry gegenüber einheitlichen Profilen (wie XDA). Warum? Weil die unterschiedlichen Höhen und Winkel der Reihen den Daumen führen. Wir haben festgestellt, dass das ATTACK SHARK 149 Keys PBT Keycaps Double Shot Full Keycap Set hier besonders effektiv ist. Das ASA-Profil bietet eine kugelförmige Oberseite, die die Seite des Daumens „umschließt“ und ein Abrutschen während panischer, hochdruckvoller Teamkämpfe verhindert.
Da es sich um PBT Double-Shot handelt, entwickeln sie nicht diesen fettigen „Glanz“, der ABS-Kappen rutschig macht. Wenn dein Daumen unter deiner Handfläche liegt, brauchst du jede Menge Reibung.
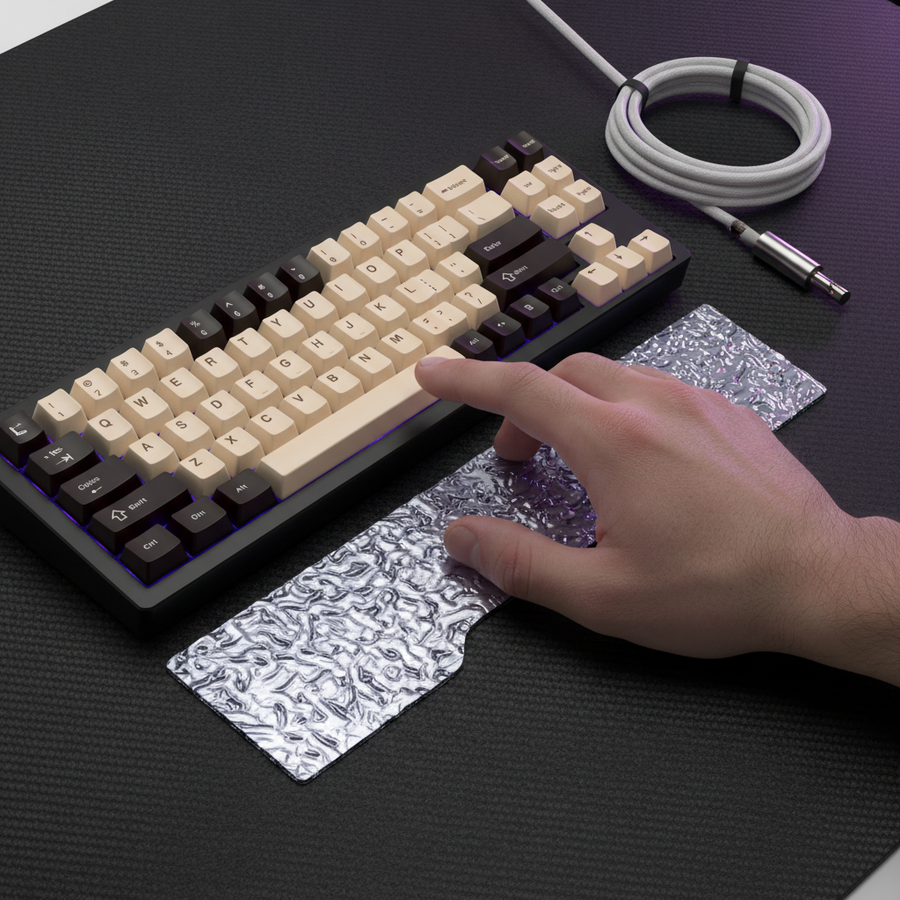
Die Blende nutzen
Der Rahmen deiner Tastatur (die Blende) wirkt als physischer „Stopper“ für deine Hand. Wenn deine Tastatur ein hochprofiliges Gehäuse hat, kannst du tatsächlich die Seite deines Daumens gegen die Blende drücken, um deine Hand zu stabilisieren, während deine Finger über QWER tanzen. Dieser Gegendruck ist für die Richtungspräzision unerlässlich. Laut der USB HID-Klassendefinition (HID 1.11) meldet ein Gerät seinen Zustand binär, aber die Art, wie wir mit ihm interagieren, ist analog und physisch.
Die Realität des 8K-Pollings
Wenn du es mit deiner Eingabetechnik ernst meinst, schaust du dir wahrscheinlich Ausrüstung mit hoher Polling-Rate an. Aber in der Branche findet gerade viel „Standard-Wäsche“ statt. Schauen wir uns die tatsächliche Mathematik des 8000Hz (8K) Pollings an.
| Parameter | 1000Hz (Standard) | 8000Hz (Hochleistung) | Begründung |
|---|---|---|---|
| Polling-Intervall | 1.0ms | 0.125ms | Frequenz = 1/Zeit |
| Bewegungssynchronisationslatenz | ~0,5ms | ~0,0625ms | Deterministisches 0,5x Intervall |
| CPU-Engpass | Niedrig | Hoch (IRQ-Belastung) | Interrupt-Anfrageverarbeitung |
| USB-Anschluss erforderlich | Beliebig | Direkter Rear I/O | Geteilter Bandbreitenverbrauch verursacht Verzögerungen |
Modellierungsnotiz (reproduzierbare Parameter): Um die Glätte von 8K-Polling visuell darzustellen, benötigt man typischerweise einen Monitor mit hoher Bildwiederholrate (240Hz+). Während einige die „1/10-Regel“ behaupten (z. B. braucht man einen 800Hz-Monitor für 8K-Polling), ist das ein Mythos. Der Vorteil von 8K liegt in der Reduzierung von Mikro-Ruckeln und Eingangsvariationen, die selbst bei 144Hz-Panels wahrnehmbar sind, aber mit steigenden Bildwiederholraten deutlicher werden.
Technische Warnung: Um eine 8000Hz-Bandbreite zu erreichen, müssen Sie Ihre Maus mit einer bestimmten Geschwindigkeit bewegen. Bei 800 DPI benötigen Sie mindestens 10 IPS (Inches pro Sekunde). Wenn Sie mit 1600 DPI spielen, reichen 5 IPS aus, um diesen 8K-Stream aufrechtzuerhalten. Hohe Pollingraten sind ein „systemweiter“ Upgrade; erwarten Sie nicht, dass sie auf einer Budget-CPU oder über einen USB-Hub perfekt funktionieren.
Das 2-3-Wochen-Anpassungsprotokoll
Sie können nicht einfach auf einen Alt-Claw-Griff umsteigen und erwarten, über Nacht Challenger zu werden. Tatsächlich wird Ihre Leistung anfangs wahrscheinlich sinken, während Ihr Gehirn seine Muskelgedächtnis neu verdrahtet. Basierend auf häufigen Mustern aus dem Kundensupport und Feedback von Profi-Spielern empfehlen wir einen 3-Phasen-Übergang:
- Die Übungsphase (Tage 1-7): Verbringen Sie täglich 15 Minuten im Übungstool. Springen Sie nicht in Ranglistenspiele. Konzentrieren Sie sich auf „Modifikator+Taste“-Kombinationen (z. B. Alt+Q, Alt+W). Achten Sie auf Ihre Handgelenkposition. Wenn Sie einen stechenden Schmerz spüren, hören Sie sofort auf.
- Die Integrationsphase (Tage 8-14): Beginnen Sie, den Griff in risikofreien Umgebungen wie ARAM oder Normal-Matches zu verwenden. Hier kommt der „Überlebens-Bias“ ins Spiel – viele Spieler geben hier auf, weil sie sich „langsam“ fühlen. Bleiben Sie dran.
- Die Reflexphase (Tage 15-21): Bis jetzt sollte das Einklappen des Daumens natürlich wirken. Sie werden bemerken, dass Sie Ihre Hand nicht mehr so stark anheben, um Modifikatortasten zu erreichen, was Ihre Finger näher an den primären Hotkeys hält.
Ergonomie: Die Variable Handgelenkauflage
Die Höhe und der Winkel Ihrer Handgelenkauflage sind die meist unterschätzten Faktoren für die Beweglichkeit des Daumens. Wenn Ihre Handgelenkauflage zu hoch ist, wird der Bewegungsradius des Daumens eingeschränkt und Ihr Handgelenk wird in „Ulnardeviation“ gezwungen (Beugung zur kleinen Fingerseite).
Für ein festes Setup mit hoher Hebelwirkung ist die ATTACK SHARK Black Acrylic Wrist Rest eine Referenzwahl. Das geneigte Design hebt Ihre Hand in eine natürliche Position, sodass der Daumen darunter eingeklappt werden kann, ohne die Schreibtischoberfläche zu berühren.
Wenn Sie jedoch bereits eine Gelenkempfindlichkeit haben, könnte die „Festigkeit“ von Acryl zu stark sein. In solchen Fällen bietet die ATTACK SHARK Cloud Keyboard Wrist Rest Memory-Schaum-Unterstützung, die sich Ihrer individuellen Handflächenform anpasst. Stellen Sie nur sicher, dass Ihr ATTACK SHARK Cloud Mouse Pad auf derselben Höhe ist, um den Sensorwinkel konstant zu halten.
Sicherheit zuerst: Vermeidung des "Claw Cramp"
Seien wir ehrlich: Der Alt-Claw ist eine "aggressive" Haltung. Obwohl er Ihnen einen Wettbewerbsvorteil verschaffen kann, ist er nicht für jeden geeignet. Laut dem Global Gaming Peripherals Branchen-Whitepaper (2026) sind ergonomische Verletzungen im Esport oft die Folge von "statischer Belastung" – das zu lange Halten einer angespannten Position.
Profi-Tipps für Langlebigkeit:
- Der Rahmen-Check: Stellen Sie sicher, dass Ihre Tastatur nicht verrutscht. Verwenden Sie eine rutschfeste Schreibtischmatte, um Ihren "Anker" stabil zu halten.
- Mikropausen: Alle 30 Minuten den Daumen vollständig strecken und das Handgelenk drehen.
- Sensor-Ausrichtung: Beachten Sie, dass eine Änderung Ihres Handgriffs den vertikalen Sensorwinkel leicht verschieben kann. Wenn Ihr "Alt-Claw" Ihre Hand zum Kippen zwingt, müssen Sie möglicherweise Ihre In-Game-Empfindlichkeit anpassen, um die Hebeländerung auszugleichen.
Zusammenfassende Checkliste für das Alt-Claw-Setup
- Tastenkappen: Geformtes PBT (ASA- oder Cherry-Profil) für besseren Griff.
- Handgelenkauflage: Geneigt, um Daumenfreiheit zu ermöglichen (Acryl für Hebelwirkung, Cloud für Komfort).
- Abtastung: 8K aktiviert (nur direkter Motherboard-Anschluss).
- Training: 15-minütige tägliche Übungen für 21 Tage.
Das Beherrschen des Alt-Claw bedeutet nicht, härter zu arbeiten, sondern intelligenter mit der Anatomie zu arbeiten, die Sie haben. Indem Sie den "toten Raum" Ihres Daumens optimieren, erschließen Sie eine Ebene der Modifikatorsteuerung, die die meisten Spieler einfach nicht erreichen können. Denken Sie nur daran: Hören Sie auf Ihren Körper. Eine 20ms schnellere Kombi ist keine sechsmonatige Erholungszeit wert.
YMYL-Hinweis: Dieser Artikel dient nur zu Informationszwecken und stellt keine professionelle medizinische Beratung dar. Ergonomische Bedürfnisse sind individuell verschieden. Wenn Sie anhaltende Schmerzen, Taubheitsgefühle oder Kribbeln in Händen oder Handgelenken verspüren, konsultieren Sie bitte einen qualifizierten Arzt oder Physiotherapeuten.
Quellen
- USB HID Klassen-Definition (HID 1.11)
- Global Gaming Peripherals Branchen-Whitepaper (2026)
- FCC Gerätezulassungsdatenbank
- Attack Shark Performance-Modellierung - 8K Abtaststandards
Quellen